Wondering how to curve text in Canva?
Curved text has so many uses, from logos to stylish social media graphics.
But if you’ve used Canva as a graphic design tool for years, you’ll remember that curving text in the app was painfully time-consuming.
Good news! The days of creating curved text with single letters, then adjusting them one at a time, are behind us.
There’s now a special effect for curving text, and lots of fun ways to use it!
Let’s see how to curve text in Canva free, Pro, or app, and what you can do with it.

How to Curve Text in Canva
If you want to bend text in Canva, here’s how!
Choose an image size or design template for whatever you’re working on, and open a new document.
Next, type or paste the text into a text box that you want on a curve. If you wish to use your own font, now’s a good time to upload custom fonts to Canva.
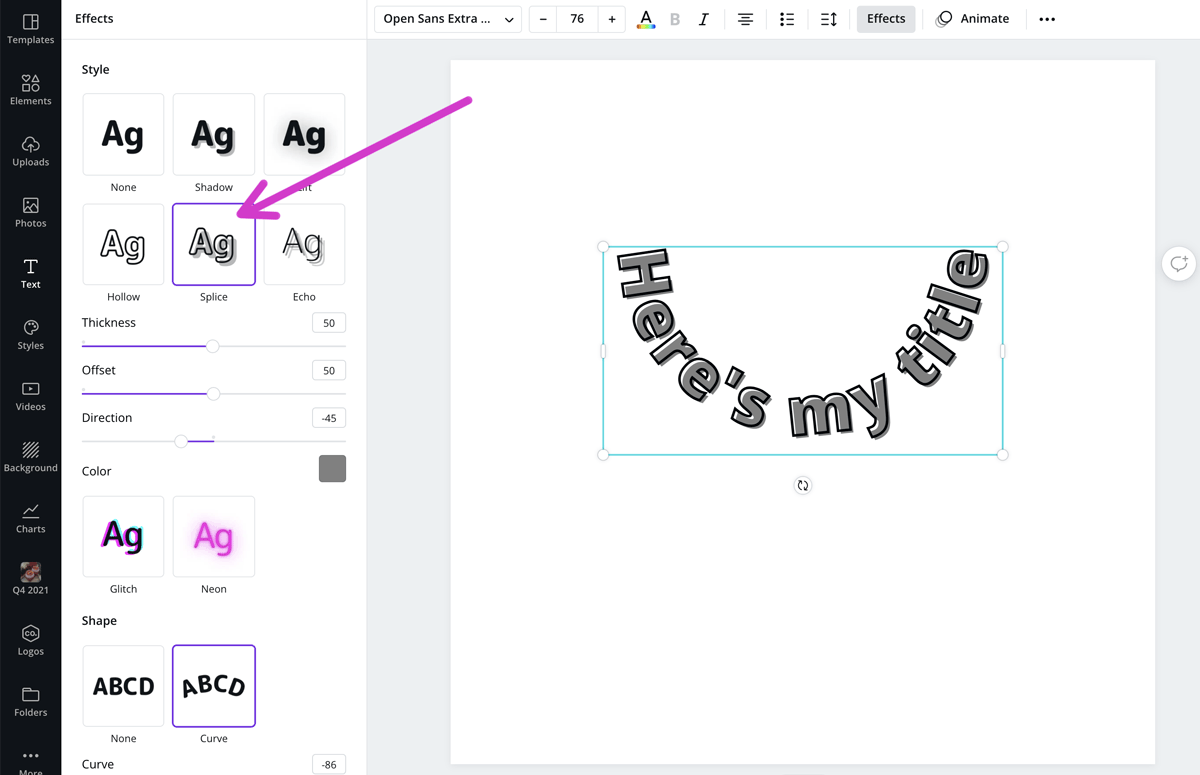
Click the Effects button on the top menu bar when the text is highlighted.
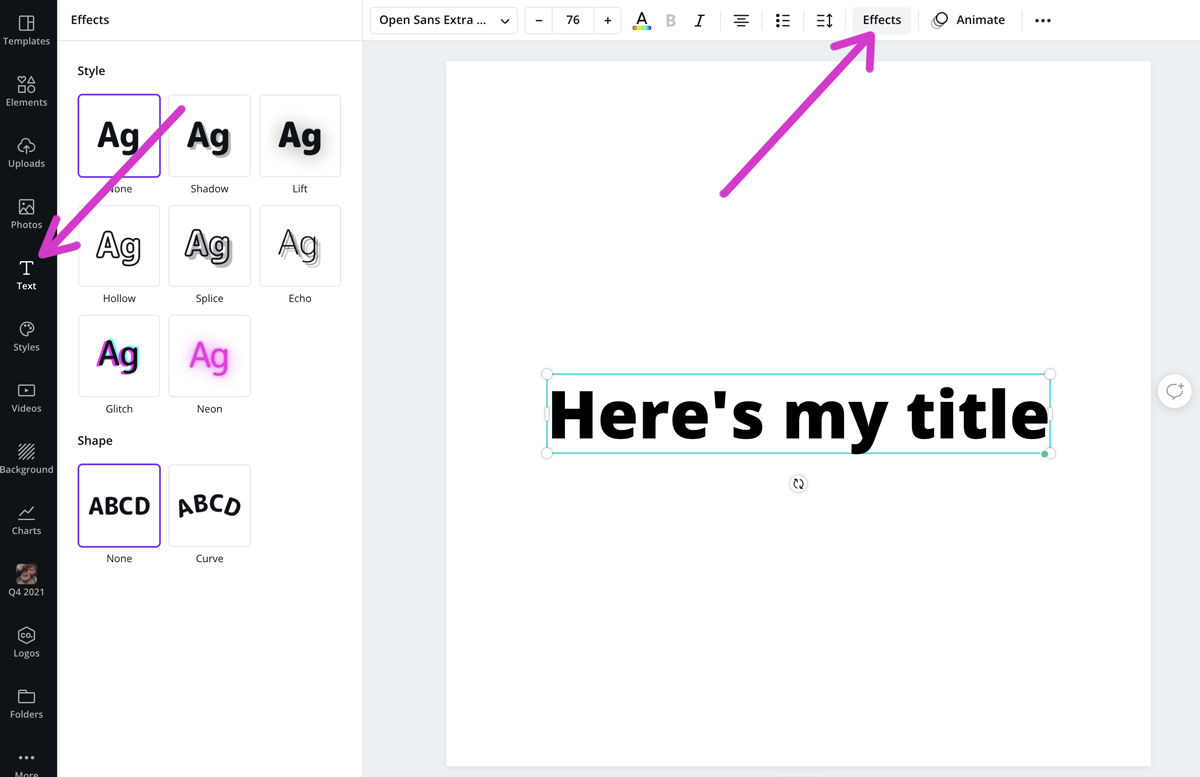

At the bottom, you’ll see the option to curve your text. Click this to open the adjustment panel.
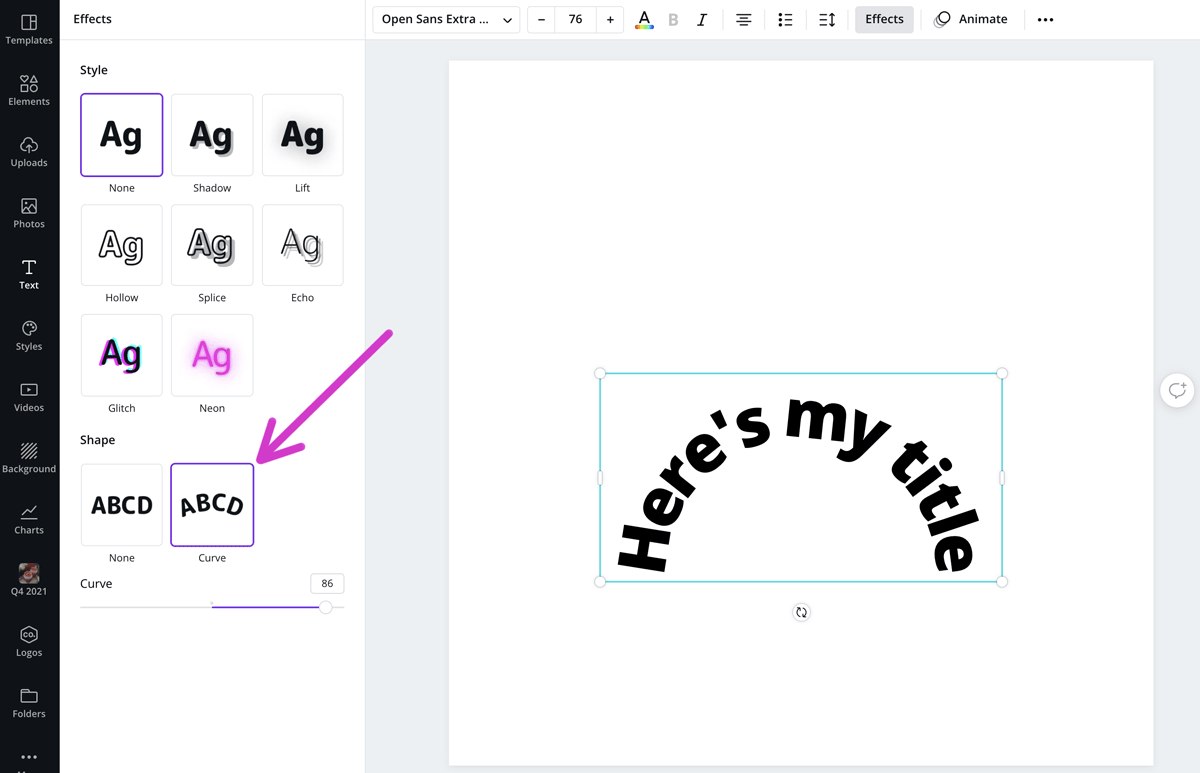

It defaults to a semi-circle which is around 86 degrees.
You can then use the slider to move this to make it more circular.
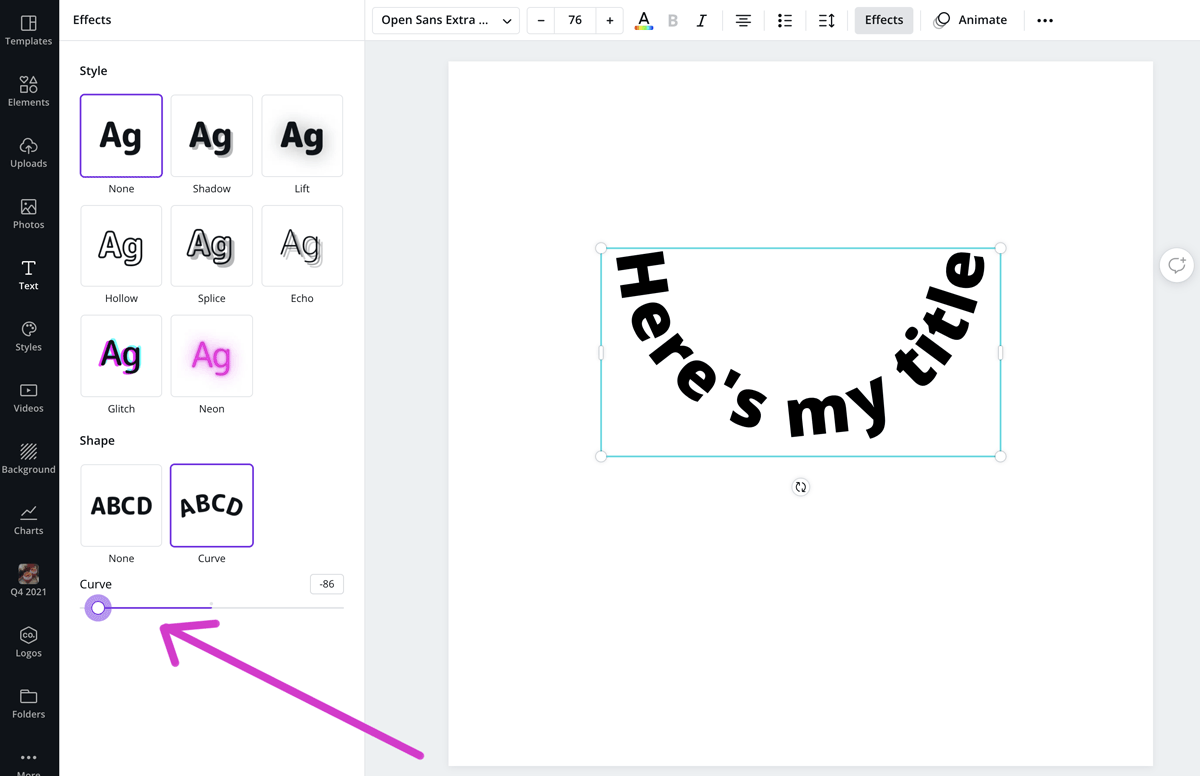
Or you can change it so that it curves in the other direction by moving the slider to the left.

You can also add other styles to the text from the same panel. In this case, I added the ‘Splice’ option.

Combining Curved Text with Elements
One of the most common things to do with the curve text feature is to combine it with elements.
Circles are the obvious choice, and it’s easy to adjust the curve of the text to match the circle.
Choose a circle from the Elements menu and make it the size you require.
Move your text to the position you want, and start using the slider to get the right curve angle.
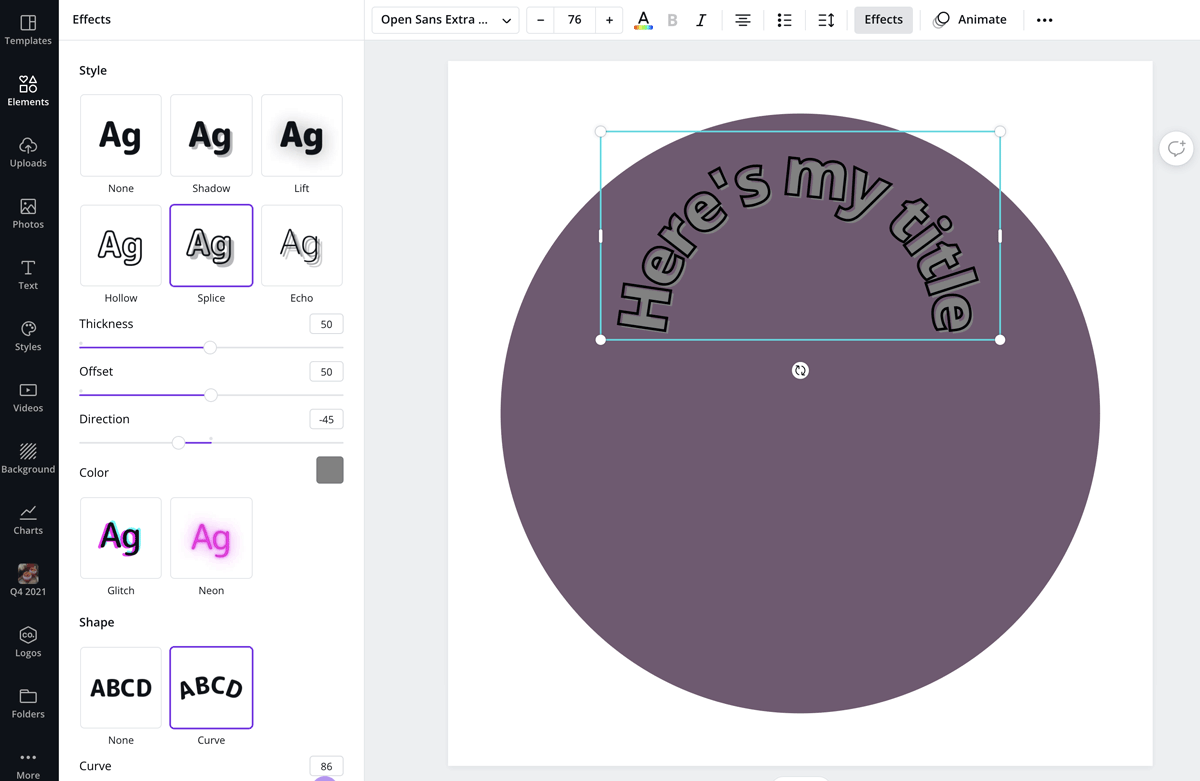

Once the curved text circle follows the element circle, you know they are matched up.


You can also use the rotation button to move where the text sits on the circle.
For example, move the text to a 90-degree angle and move it sideways.
Then you have your curved text running along the right-hand side of the circle.
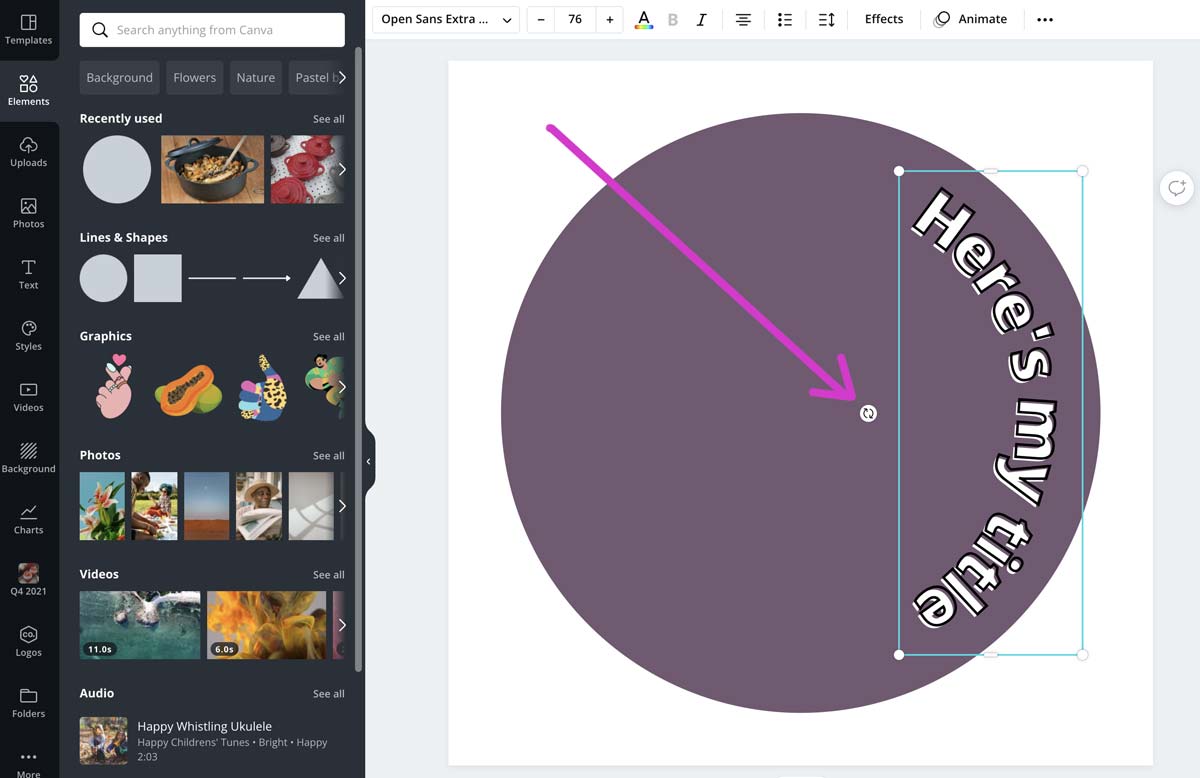

You can also use the letter spacing to make the words stretch further.
How to Curve Text on the Canva Mobile App
The process on the app to curve text is similar.
Tap on the text and select the purple + button to open the menu for text options.
Scroll along until you see the Effects option. Click it, and then click on ‘shape’ along the bottom.
Now you can follow the above process to curve the text.
Adding More than One Curved Text Box
You don’t have to limit yourself to one curved text box, either.
For example, if you want a heading in one font and a subheading in another in different positions, just add another text box.
Here I’ve added a subheading along the bottom and moved the slider to -65. This matches the angle of the heading, but mirrors it along the bottom of the circle.
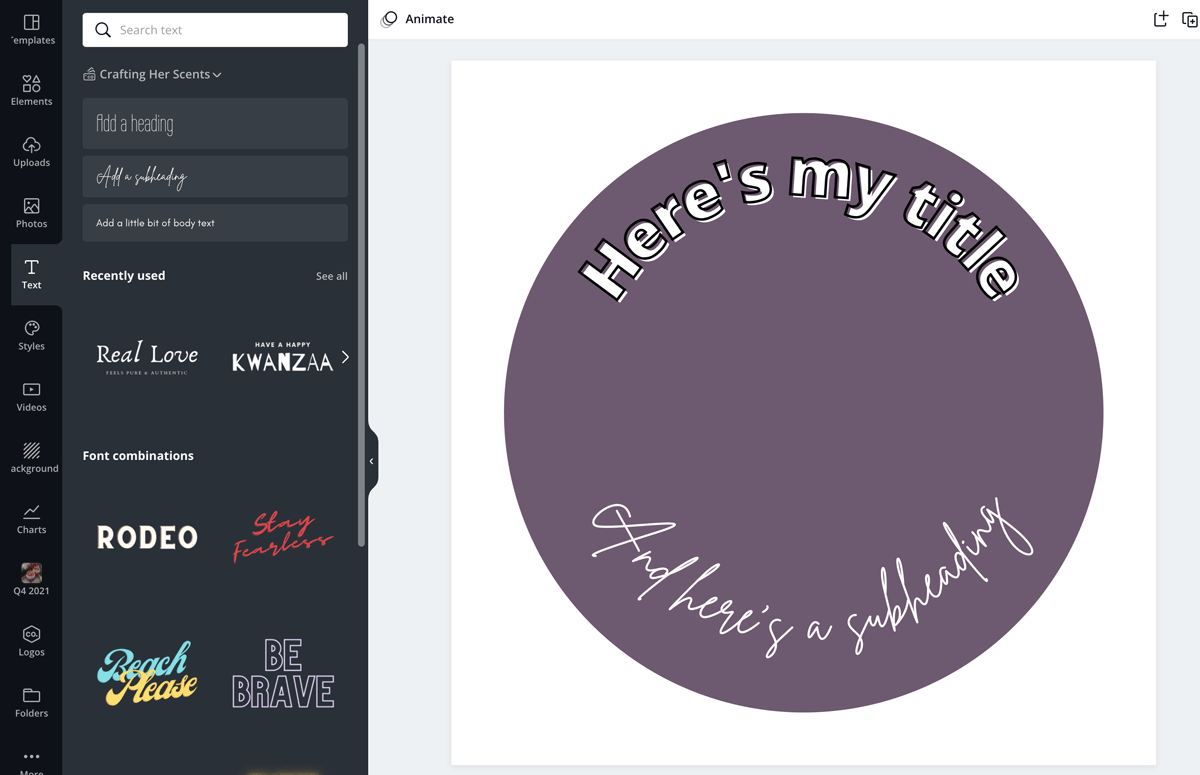

This kind of style works well if you want a logo with a tagline on it.
Or if you are designing stickers for your planner and want more than one text box on it.
Examples of Curved Text in Action
If you love the idea of the curved text feature but can’t quite see how to use it, Canva has some great templates for inspiration.
In an Instagram image, for example, type ‘curved text’ in the search bar.
You’ll find loads of great examples of curved text in their templates.
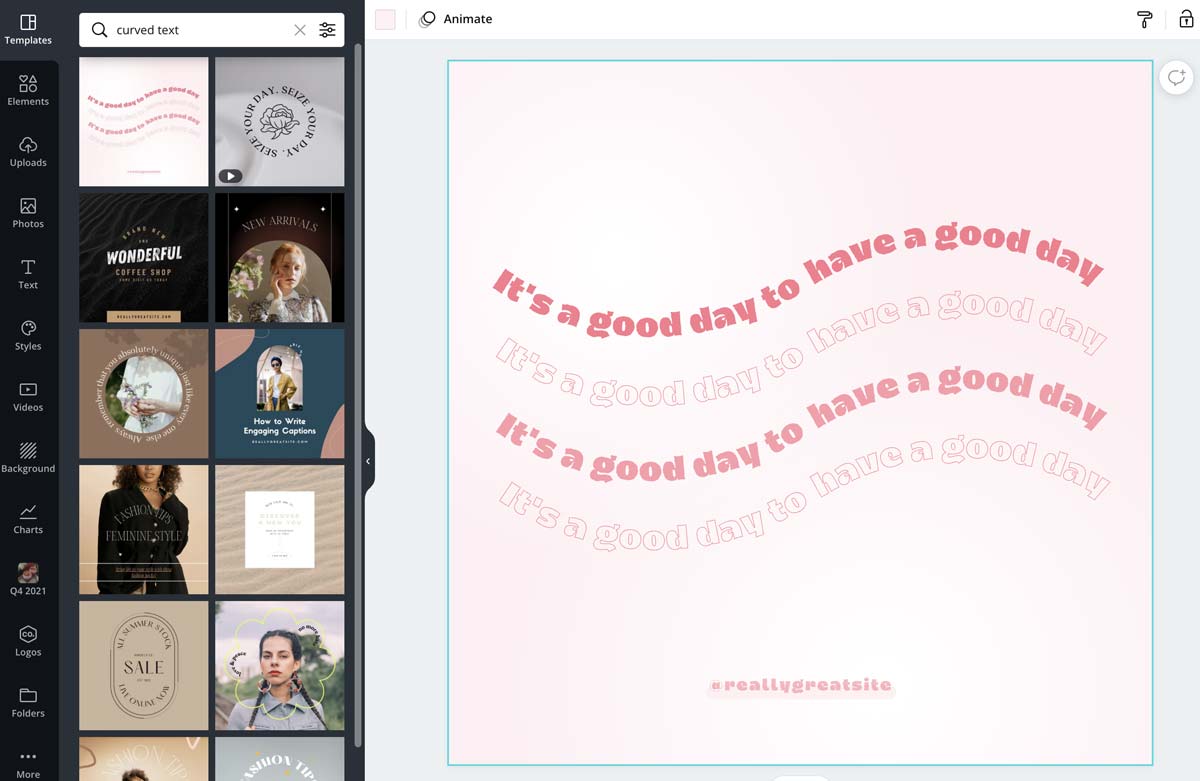
This one is great for the repeated quote style graphic and uses two text boxes to create each line. Then just duplicate and change the transparency.

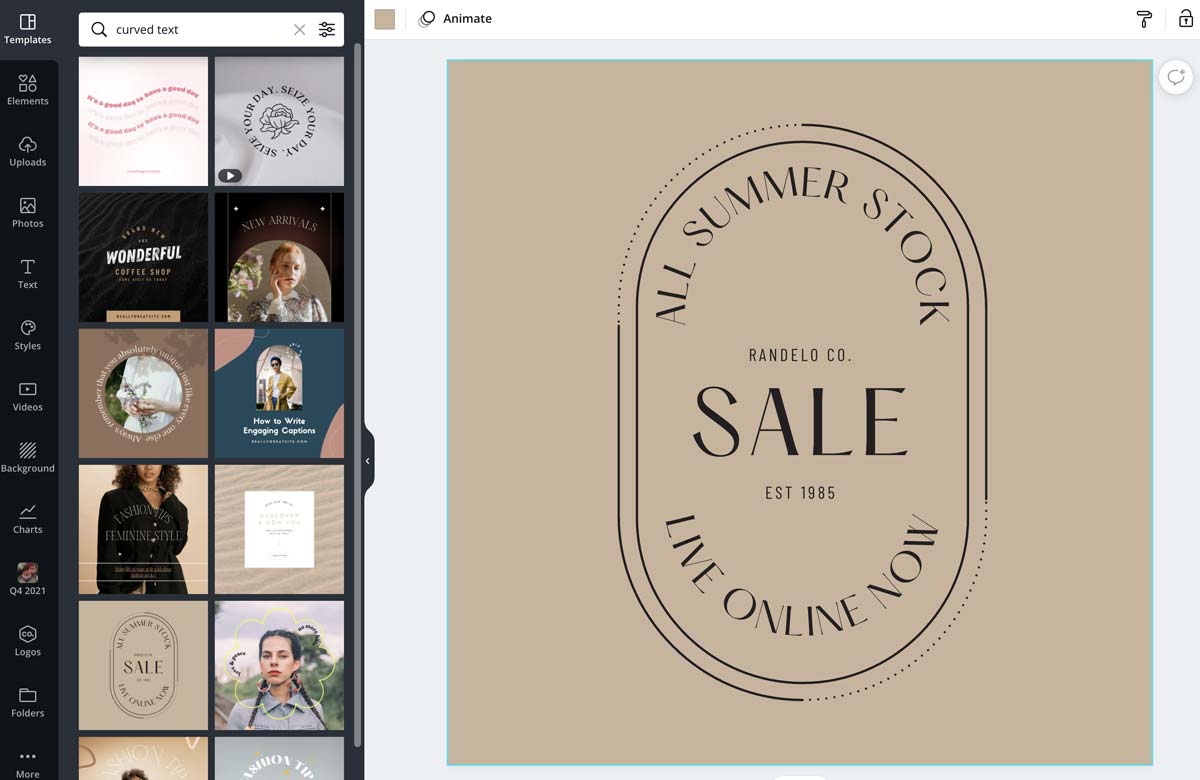
This promotional image looks classy with the curved text at the top and bottom of the shape.

And this one uses a longer piece of text to entirely circle the globe image in the center.


Stylish Curved Text Designs
Adding curved text is available on the free version of Canva, and on Canva Pro.
It lets you add that stylish, organic look to your designs, and adds a touch of class to things like logos.
Stop the scroll on social media! How could you use curved text in your designs to make them even more eye-catching?
Disclosure: If you purchase a plan, I may earn a commission, at no cost to you.
Want more tutorials?
Learn keyboard shortcuts and more in my ultimate guide on how to use Canva!

diana says
You saved me! SO easy to understand. A little frustrating to NOT find this anywhere in Canva. Mil gracias!
Louise Myers says
You are so welcome! Thanks for taking the time to leave a nice comment 🙂